January 26, 2015

Bloomin'


This didn't work. I so wanted this to work, but it DIDN'T!!  My hair dryer must have been the weakest thing on the earth that day. Do I sound like Charlie Brown? I looked again on Pinterest and found that other people used what was called a heat gun. I had never heard of such a thing, but there it was. I don't blame http://aroundbeads.blogspot.com/2012/01/grandmas-garden-crayon-art.html, it looked like she had a very powerful hair dryer.

So, we cheated and painted the stems instead of the nice drizzly effect of melted crayon.  You might think by looking at the pictures that the crayon wrapper prevented the melting.  Nope, I tested an unwrapped crayon.  Therefore, instead of the exposed crayon on one end, I just let the kids hot glue the crayons as they picked them from the basket.  No problem--the effect of blooms is still visible :)


I guess the instructions got lost in translation.  The kids were supposed to choose colors that were in the same hue. Oh, well...


I guess this project was an example of "winging it".  These were kinder and first graders. I'll keep my eyes out for a heat gun this year.  Uhmm, I wonder if the art teacher would have one.


Supplies:
1.  crayons (preferably unbroken ones)
2. hot glue gun
3. paper for background
4. artificial flower petals
5. paint (of course, this was not in the original project)

Directions:
1. have children arrange placement of crayons on paper
2. hot glue crayons to paper
3. configure where the blooms will be
4. paint on the stems

Duration:
This is a 30-45 minute project


January 25, 2015

Spotted -- Macchia "Glass"


This is another Chihuly-inspired project.  Our children are being exposed to more of the glass work of Dale Chihuly, especially because he hails from Seattle.  Surely, we must make a trip to the Seattle Center to see a glimpse of the glass garden. And perhaps the parents can take their children on a trip during the summer to Tacoma to browse around the Glass Museum. 

On http://artwithrmotta.blogspot.com/search/label/Chihuly%20Art%20lesson%20plans, which I found on Pinterest, we were given the means to continue building on our "glass work".  I mimicked the wall design, but I also added the "glass" from our previous projected called Imitation Glass.

For this project, the kids had to color two coffee filters.  I told them they did not have to color in all the white spaces.  They blew a sigh of relief. With the Imitation Glass, instructions were to color all of the clear plastic.


I asked them to cut around the lip of the coffee filter so that they would not all have the same uniform shape.


Ahh, the dreaded rubberbands.   "Watch me;  I'll do the first one and you do the second."  After several attempts,  "How do you put this on?" 


Since we had two in-house bathrooms, we shut down one to use as our spray house.  That's where we are with newspapers laid out and the cups placed on the floor waiting for...


the spray starch.  This was foreign to the kids.  Does anyone iron their clothes anymore?  A few were tentative to handle the spray can.  After instructions as to how to hold the can, what finger to use, a demonstration in squirting (short bursts) , you can imagine that those cups were drowned in their own stiffener, not to mention the underlying newspapers.


Here are some cups in the drying stage.


And some more.


These are dried and released from their rubber bands.


More batches getting ready to be displayed.  And how do I do that?  That skyscraper of a ladder is needed to scale the wall.  No worries.  Yes, I'm afraid of heights.  I'll let my partner do it.


Here are a few of the "Macchia" close up:


Supplies:
1. coffee filters (ours were small)
2. markers
3. scissors
4. spray starch
5. rubber bands
6. paper cups 
7. newspaper

Directions:
1. cut around the lip of the coffee filter making interesting edgings
2. have kids decorate the coffee filters with markers
3. place filter over drinking cup and secure with a rubber band
4. lay out newspaper
5. place cups on floor
6. spray with starch and let dry
7. display

Duration:
Depending on how fast you color, only 20-30 minutes, plus drying another 40-50 minutes

Note:
By the way, "macchia" is Italian for spotted.


January 22, 2015

Imitation "Glass"

I learned about this artist 2.5 years after I came to this green state. So I asked the question to those born here: How many of you have heard of the artist Dale Chihuly? I was so surprised that I said you guy were born here and you haven't heard of Chihuly?  So that meant we were about to embark on a little glass journey.  I first did this project in 2013, but this time was even better.  The blog I found was http://artasticartists.blogspot.com/2011/03/chihuly-glass-bowls-and-forms.html.  Since that time our class made different versions of Chihuly-inspired projects.  Check it out!


                                  I wish we could just have a huge set of Sharpies available all the time.


Well, this is the first stage. Coloring all the clear spaces makes all the difference in how the outcome will be.


In the oven baking.  It's hard to photograph because of the reflecting light.


These two should have been videotaped.  They were content to sit in front of the hot oven to watch the process of shrinking.


Here are the masterpieces that the children made.  You cannot deny the originality of the pieces! They look gorgeous!!


I even had to do one.


You just cannot get away from those Seahawk colors.  Drats! You can't deny the beauty1


This really has the shape of the human heart. If turned a different way, that red color could be the aorta and from the front, it actually looks as if it has four chambers.


Supplies:
1. clear drinking cups
2. Sharpies
3. oven or toaster

Directions:
1. color drinking cups with Sharpies
2. place in oven or toaster until cup stops shrinking

Duration:
30-40 minute project

Note:
The first time I did the project was in the toaster oven. I didn't realize that the new toaster was smaller than the original toaster, and therefore the cups did not fit.  We do have a full-on kitchen. So this time, they had to go in the oven, which was set at 350 degrees.  I liked the oven better than the toaster because I think there was better heal control.  Anyway, see what way works for you.

January 19, 2015

A Costumed Dress


The finding of this book in our library was the catalyst that caused me to motivate a dedicated book reader to attempt to design a costume made of leaves.


These are a few of the dresses within the book that were awesomely made.


Aren't these the most gorgeous gowns you have ever seen? Who could have imagined that you could design something so beautiful from items found in nature ?!


Here's the story behind the book. What would you do with a child that comes in the morning quiet as a mouse and begins reading every single morning? How do you motivate someone who loves to disappear into books and not interact with others her age? No matter what I suggested, she never budged from the sofa.

My supervisor had brought in a book that I hadn't noticed for weeks.  It was propped against the wall on a book shelf.  Since it was taller than the other books, my eye caught sight of it and I took a peek inside.  I had found the answer!  Although this young girl was not part of my group, I had observed her with some of the girls I do have in my group.

Before we moved to this new location, this group of girls would pull grass, pick flowers, pebbles, and build little havens for fairies. They had great fun imaging homes for invisible little presences.  I brought the book to the 10 year old and told her I found a book that she might be interested in.  We looked at it together and she got so excited that she asked to take the book home.

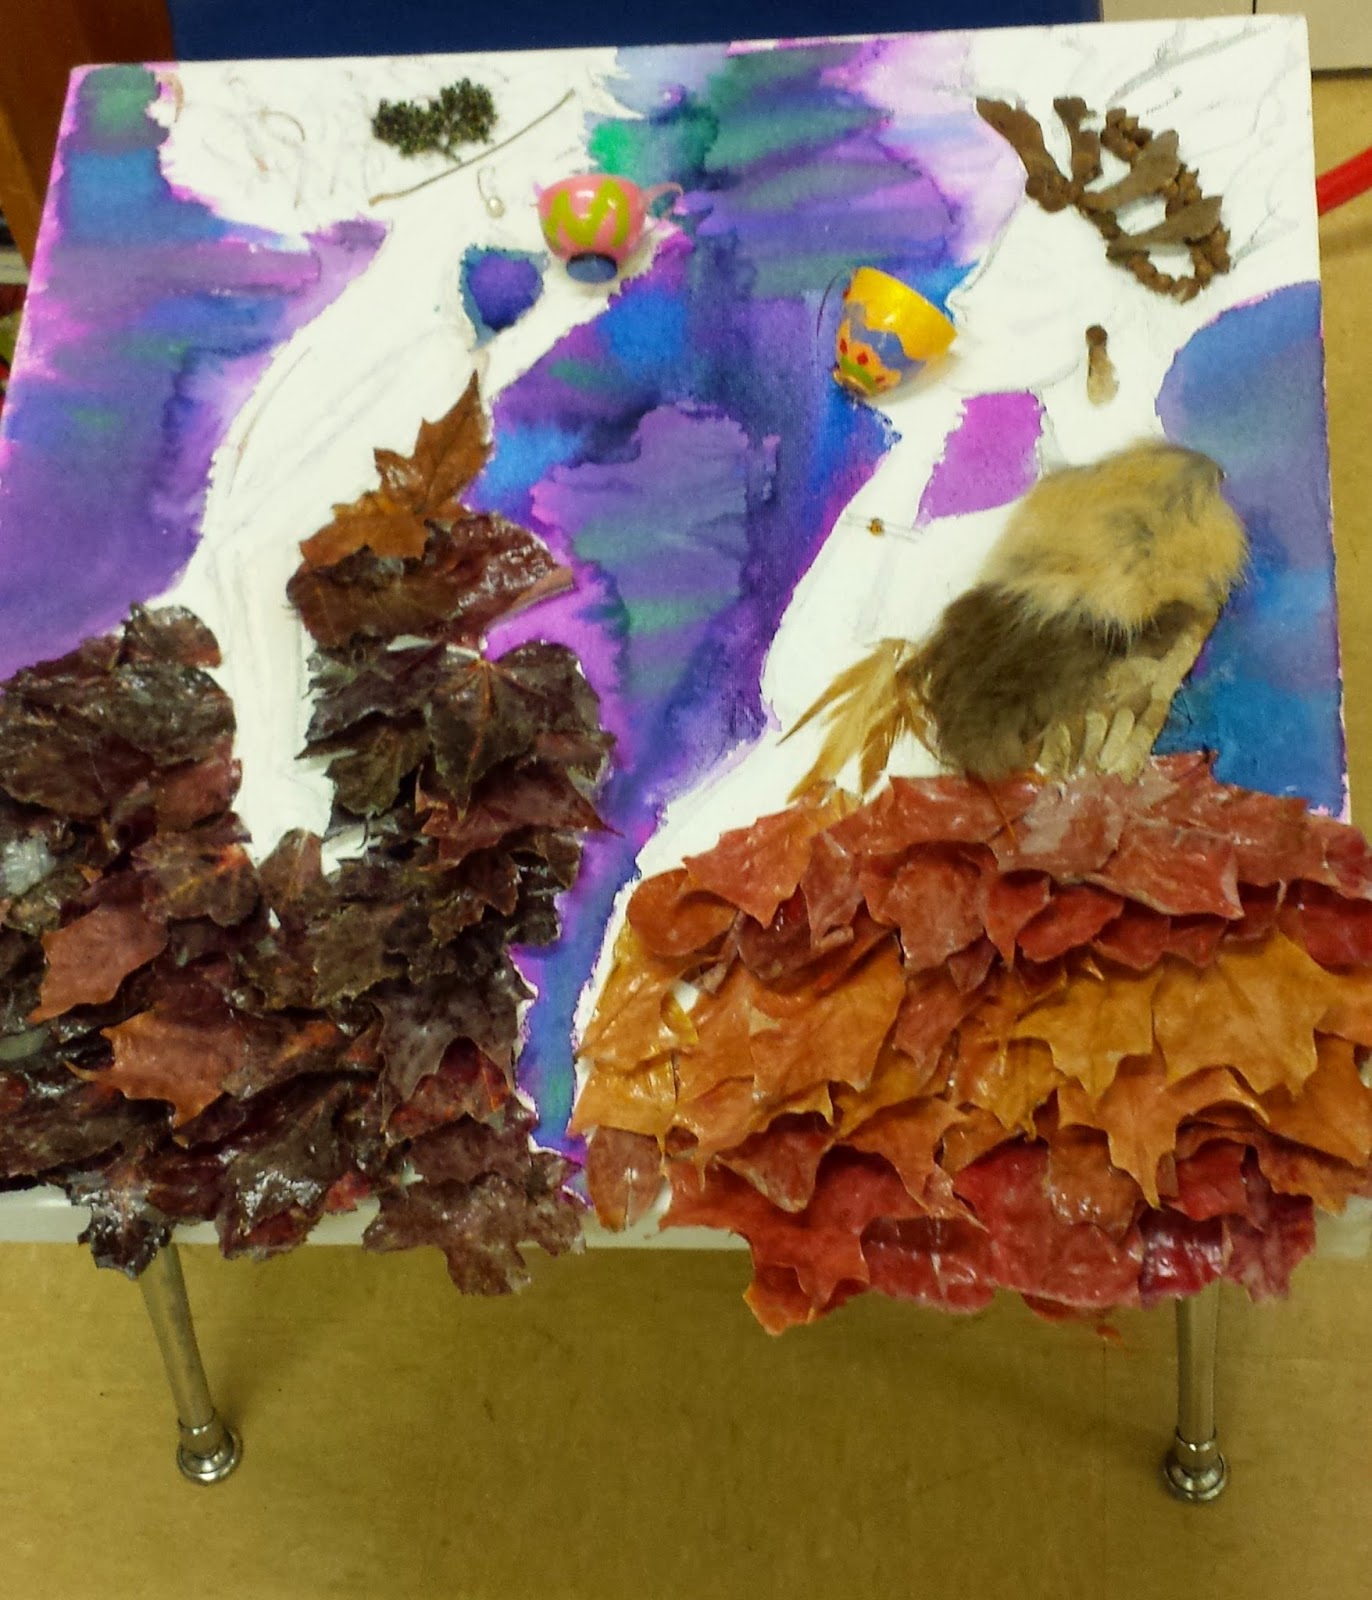
The following week I asked her if she was inspired to make anything.  She said that she started something at home, but then the book reading began again. So what I did was draw two women on a canvas and I ask our young designer what she thought about designing dresses for them.  She was all for it.

At first she started with some fur, but she was having a bit of time seeing how fur could be placed, how it could be cut--it just wasn't working.


Then I came up with the idea of using leaves. Since we didn't have any, we enlisted the help of two kindergartners and when out in the cold morning air to collect leaves.


You can see that the picture of the females is progressing.


It's coming along--no pressure.  


This is the backdrop for the two ladies.


Still in the process.


The background is being put in by another young girl.


Can you believe to this day this picture still needs work.  It has been abandoned for the time being.


This was an individual project to motivate a child to do something besides reading. Now she has a few girls her age involved with cooking, but that is another post.

Supplies:
1. canvas
2. pencils
3. leaves, flowers, twigs (whatever you find in nature)
4. fur, feathers
5. hot glue gun
6. water color paints

Directions:
1. draw picture on canvas
2. plan what materials you want for costume
3. hot glue materials in place to make costume
4. water color background

Duration:
There is no time limit on this project, as it was to help involve a child in an activity and drop her to interact with others.