December 9, 2014

Pumpkin Fest

Yep, pumpkin season is over as far as crafts go; but you can still buy the colorful gourds at the stores. Since I already did paper strip pumpkins this season, next year I will repeat this pumpkin craft.

When I saw this craft on Pinterest, I jumped at the idea to do these with by kinder/first graders.  I was looking for ideas to improve the kids cutting ability. I got a lot of flack from a few of the older boys for destroying "perfectly good books".  In part, I agreed with them; and on the other hand, I told them I bought them from the thrift store.  The thought of recycling a book into a new object was foreign to them.   Yes, I had to help a few cut, but they were good troupers and hung in there.  There were few complaints, which was amazing in itself.  There were a few steps that I did not follow on http://craftingmom.com/pumpkin-decorations-made-from-recycled-books/ just because I had a young group.

The cutting is the most consuming, repetitious thing. As you can see, our table is crowded with other
crafts the kids are doing.


No sponge painting for us.  We cheated by buying orange spray paint.  Since our room had no windows, we had to make a spray paint station outside.  The fumes would linger too long in the classroom.


Supplies:
1. paperback books
2. markers
3. scissors
4. twigs or construction paper
5. spray paint (orange, or if you prefer, whatever color matches your decor)
6. hot glue gun or regular white glue

Directions:
1. tear cover off of books
2. draw a pumpkin template on book page
3. cut around the template for each page of book
4. open book so that the spine is facing at you
5. hot glue your twig or rolled construction onto the spine of book
6. hot glue across front page, back page, and spine
7. press front page and back page together
8. fan out the pages
9. spray paint your pumpkin
10. add ribbon, leaf, or other decor

Duration:
This project takes 1 week for kinder/first graders.

Note:
If your book is not full enough or does not hold the round shape, glue a few pages together and that should help you out.


December 8, 2014

Feather Owls

During the summer of 2013, we had the opportunity to visit a senior citizen facility with the thought. to better know our community.  We decided to group ourselves into two groups -- boys and girls-- so that we would overwhelm the residents.

We didn't know what to expect because this was the first time we had done this.  Our girls were so talkative on our short walk there, but once inside the facility, they all became quiet.  All of them.  I think they were in shock over the condition of these seniors: how they were wheelchair bound, the infirmities they had, and how several did not or could not speak.

It was great that there was a resident artist to help break the ice.  The girls were given paper and markers to draw.  When we took a tour around the facility, we saw some of the feather artwork done by the residents.  So it became an inspiration for us to do our own.  Take a look, and sorry for the poor photography.  It would have been lovely to have a real camera, instead of using my outdated cell phone.


The seniors gave these owls real character, don't you think?


Below are the children's rendition of the owls.  I believe they captured the essence of the owls as children.  The birds are bright, colorful, artistic.  They really don't look like owls, do they?


Perhaps, these next two look more like owls?


 Supplies:
1. construction paper (choose your own background color)
2. feathers (and more feathers)
3. glue

Directions:
1. draw a large circle head and an large oval for the body
2. apply glue to those large open spaces, then add feathers

December 7, 2014

Home Sweet Home

This is probably the only craft on this blog not borrowed.  Jo-Ann had a sell on birdhouses for $1.00 each. And I just couldn't pass up such a deal.  There is a saying that "home is where the heart is". Home is where one can close the door to the world and retreat to enjoy family and intimate friends. One can only speculate what type of person(s) live in a particular home by how it is outwardly decorated and maintained; but most likely, that speculation would be way off base.

With this project, I allowed the kids to decide how they wanted to decorate their house. Whether it was with paint, glitter or marker, I wanted to see where their creativity would take them.  At this time of season, a walk in the neighborhood shows the exteriors of homes already decorated with lights adding a festive anticipation to the days ahead.


For this craft, paint seem to be the medium all the kids wanted to utilize. Several, especially the girls used glitter; and others used sequin-type shapes. Definitely, their originality shone forth.  Do these "home" bring a joy to your heart?  Well, perhaps the birds would think so :)


Supplies:
1. unfinished birdhouses/houses
2. paint
3. markers
4. sequins
5. glitter

Directions:
1. paint houses the color of your choosing
2. embellish with sequins, glitter, markers


December 6, 2014

Delicate Carnation

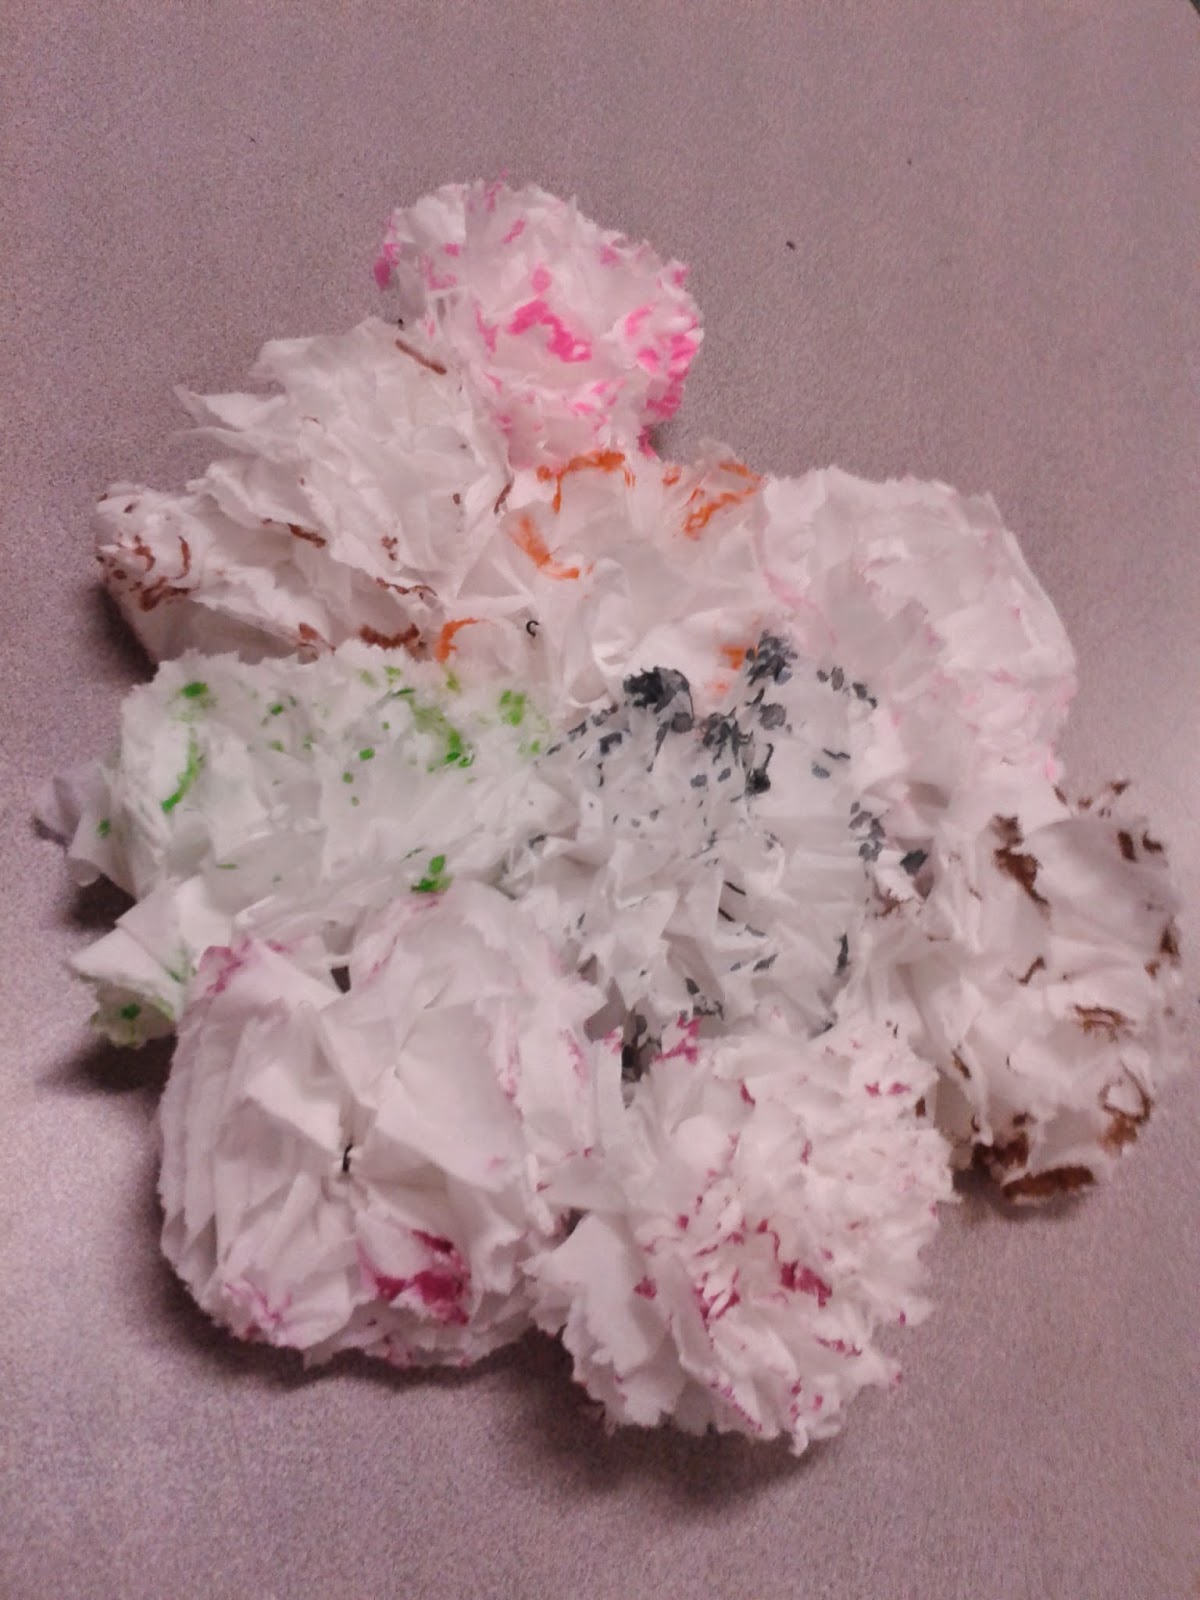
"A rose by any other name is still a rose."  Ah-h, but the carnation...it has held us in fascination for centuries.  It is a delicate beauty in creation that has undergone transformation of colors.  When I came upon Ms. Destri's post http://www.themotherhuddle.com/diy-tissue-kleenex-flowers/ on February 28, 2013, I thought this was an ideal project to learn to recreate for any special day.


I wished I had taken more photos of the process instead of just the end result.  Just as in flower shops, the kids depicted the color range one can actually find.  The one thing we did not follow was to purchase stems to place the flowers onto.  Instead we used the flowers as decorations on the front of the many greeting cards we had made previously.


I can't get over how pretty these look!  Does this give you any ideas or your own?


Supplies:
1. Kleenex tissues
2. bobby pins
3. markers

Directions:
1. place 4 tissues on top of each other
2. fold them as in making a fan, accordion style
3. open a bobby pin, placing and centering it over the folds to hold them in place
4. tear 1/4 - 1/2 inch off both ends
5. with marker, color the edges of both ends (make sure kids get underlying edges and the bottoms)
6. lastly, pull the outer layer of flower down, then next layers

December 5, 2014

Flying Marshmallows

What do you do on a day that you haven't really planned anything to do with the kids?  Well, you hit Pinterest and hope and pray you find a simple craft quickly.  And having marshmallows already in the cabinets also helped.

I found this fun activity on http://www.itsalwaysautumn.com/2013/5/31/easy-marshmallow-catapults-summer-fun-for-kids.html.  The graphics of how to construct the geometric wonder was very easy to follow; and the kids had a blast shooting them.  Of course, there had to be marshmallows left for eat.  The girls enjoyed a little competition against the boys.  Both groups wanted to see who would be the first to finish building.  I xeroxed the instructions so that they could follow the pictures of how to build the catapult, set the timer, and off they went.   What fun!


Needless to say, there were no losers.  They had too much fun and excitement in flinging the little the marshmallows across the floor, until the all the bases decided at one time not to be bases any longer. But the joy was priceless!


You can have kids measure distance or do estimations to give more depth to the craft.


Supplies:
1. skewers
2. marshmallows
3. plastic spoons
4. rubber bands

Directions:
Since the pictures on the blog It's Always Autumn gives directions so clearly, I'll let you follow them.

December 4, 2014

Capped Snowman Blocks

The holidays are fast approaching.  Hey, did someone turn up the speed dial.  The year has FLOWN by! Didn't I just turn 60!!!  The kids will be on a winter break soon, so I thought this project from http://www.kerryspapercrafts.com/?p=1709 was really cute.  We didn't use chocolate bars, though.  I thought we could rid the class of an abundance of building blocks by dressing them up for the winter.


Image quality is not good in these pictures, but you see the idea.  This is a two day project.


Supplies:
1. wooden blocks
2. white paint
3. felt squares (various colors)
4. small pompoms
5. markers
6. sewing machine
7. scissors
8. string
9. hot glue gun

Directions:
1. have kids paint wooden blocks white
2. ask kids what color felt square they want
3. sew long side of felt together to make a seam
4. have kids slip felt over block making a rolled cuff
5. tie string around felt with placement on near top of block
6. have kids cut fringe around felt cap (do not cut down the seam)
7. hot glue small pompom to front of cap
8. draw a face on front of block with markers
9. tie a small strip of felt in a different color to make a belt (optional)

December 3, 2014

Chalk One Up


Hi all,

I'm redoing this project this year with a different twist, or I should say my partner is doing this project with the kids.  He liked the three pictures that I managed to have from last year.  I did this project on May 2013 getting the idea from http://www.thatartistwoman.org/2011/09/chalk-pastel-sunflowers.html. I love the creativity of this artist.  Just look at the few examples that the kids did.

We are now in the process of doing this project with a new crop of kids, but this time we want to see what the kids will do with something more abstract.  These first photo were from spring last year. The one I love the most is what the student called a diamond; but it looked to me like a teepee when inverted.  Which way do you like it?


I admit this photo is very fuzzy, but I couldn't pass up the scope of the child's imagination.  It looks as if I am looking down into a flower.  The children had no pictures or props.  They were told to fill the page with a large object.


This week I can show you more of the process of what went on.  Take a look.  These definitely are extremely different from last year.


This collage reminds  me of stained glass windows. Do you think so?  These have a different allure than last year's pictures. This project takes two days to complete.


Supplies
:

1. construction paper (dark colors such as black and dark blue look the best)
2. pencils
3. white glue (Elmer's)
4. chalk pastels
5. hair spray (to set chalk)

Directions:
1. draw a picture in pencil
2. trace over penciled drawing with glue, and let dry
3. color in sections with pastels using fingers to blend colors
4. seal with hair spray